Friday 29 March 2013

5 day 'No Makeup Challenge'

Hi guys!

As I haven't posted in a while, I thought up an idea that should hopefully help you build your confidence, self esteem and enhance your natural beauty.

Everyone is beautiful.

Once you start wearing makeup, people seem to lose sight of their natural beauty. I was talking to somebody a few days ago and I said, "I look terrible without makeup on!" and they said, "You think that's how you look" and it's true, makeup distorts our view of "pretty" and can often make us feel as if it's the only way we can put our best foot forward.

Sure,  I understand there are lots of things about ourselves that we don't like, but we have to learn to accept this and be grateful for the face we have been blessed with.

Now, here is the challenge! :)

So... You can go without makeup for 5 days (I believe in you!) 

RULES:

  1. No makeup!
  2. You can do your normal skincare regime.
  3. The full 5 days must be completed.
  4. Do whatever you would usually do (don't hide!) 
TIPS:
  1. Drink plenty of water.
  2. After waking up, place two cold spoons over the eyes and under the eyes for around 5 minutes to  reduce puffiness due to water retention.
  3. Cleanse, tone, moisturise.
  4. Place teabags/cucumber on the eyes to reduce dark circles.
  5. Moisturize the lips using vaseline or beeswax lip balm.
  6. You can curl lashes with warm fingers!
  7. Pinch cheeks gently to get a natural flush.
  8. Smack lips a little bit to bring rosy colour to the surface.
  9. Sleep well!
Doing this challenge may not nessasarily change your life, but it might help you look from a different perspective. 

Thanks for reading and keep smiling, you're beautiful! x

Sunday 10 March 2013

Makeup removing tips

Have you ever stood/sat by the mirror with a face full of makeup and do not have a clue how you are going to be able to get it all off before bed? Yes, we have ALL been there unfortunatley.

It is very important that you do not skip steps and go to bed with makeup still on. It's bad for your skin and could potentionally give you an eye infection.


  1. Using an eye makeup remover liquid form, carefully get a cotton pad OR ball and holding the cotton up against the hole, tip the cleansing liquid onto the cotton. 
  2. Wipe gently around the eye, focusing on the lid. This step will get rid of the majority of the eyeshadow etc. (this step can be used for the face but it's better to use another product)
  3. With a cotton bud or Q-Tip, soak it in the same way in the eye makeup remover liquid. Sweep along the lower lash line in back and forth motions. This will remove any traces of eyeliner. 
  4. For the face makeup, use a cleansing foam or liquid or face wipes. Face wipes should ONLY be used on the face, they can sting and irritate sensitive eyes! 
  5. After removing all the makeup, apply a small amount of moisturizer and massage into the skin. 
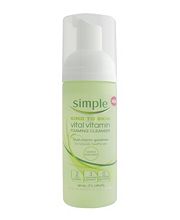
Here are some products that I love to use! 

All of these products are avaliable in boots and superdrug for in expensive prices! Give them a try! :) 

Saturday 9 March 2013

Fraulein Pro 32 pcs Brush Roll- Review

I was desperatley looking for a brush roll but I was not willing to splash the cash on a set of MAC brushes or another high-end brand. So, I was searching on amazon.co.uk and found a great alternative. The brand name is "fraulein" and ALL the products and various brush rolls are seriously cheap! I read some reviews and decided to purchase the 32 pcs set from their range. I'm glad to say, I am pretty happy I made the purchase at only £11.99.

Quality: The larger face brushes are slighly rough to the skin yet still useable. The brushes do not shed terribly as I thought they might. The main brush that sheds is the large fan brush but even then, it really isn't a big deal at all.

Presentation: Each and every brush came with a plastic wrap and the larger brushes came with a thicker (rubber) casing on them which I advise should be kept to mantain the brushes condition. The "leather" case is black, fake leather which is fine. It doesn't smell amazing but it is not the most important factor after all. The case also comes with two strings to tie it up plus a pocket for each brush and a flap to cover the bristles.

Overall Opinion: I like the wide variety and for that price, it is an outstanding deal. If you are looking for the very very best quality maybe these are not the brushes for you but I think that if you can live with some shedding and possibly not amazing bristle quality (this only applies to the face brushes I think!) and also they need to be given time to soften up and wear in a little, just like if you were to get  new pair of shoes! Give them a shot.


Rating: 7/10 


Keep smiling, you're beautiful! x

Wednesday 6 March 2013

Connect with "Libby Loves!"

twitter: @libbybeautyinfo
email: libbylovesbeautyinfo@gmail.com


Cleaning brushes

If you have just started out with makeup, or don't have heaps of knowledge about makeup and brushes in particular then no worries, stay right here to find out more!

If you don't clean your daily makeup brushes then it's almost as if you are not cleaning your face!
Brushes are the perfect place for bacteria to harbour. They can contain old makeup, grease, dirt and most of all bacteria!

It's important that they get washed every now and then to make sure you don't get any break outs from the oils and also to stop eye infections for eyebrushes full of bacteria.

But you can easily stop those irritating things from happening by just taking a little bit of your time to give them a good ol' scrub! :)


  1. Select the brushes that you use most often. For example; stippling brush, fluffy eyeshadow brush
  2. In the sink, prepare a shallow bath with warm water, not hot. Hot water may damage the brushes. For instance, the hot water could melt the glue causing horrible shedding brushes! Yuk. 
  3. Apply a very small dab of baby shampoo to the tip of each brush. Don't use anything too perfumed on your brushes!
  4. Work the shampoo deep into the bristles until you get a soapy lather. 
  5. Rinse them thouroughly into the water and then under the tap with cold water if you wish. 
  6. Pat them dry with a towel so that they are not dripping wet. 
  7. Roll each brush individually in cling film with a couple of centimetres left at the tip. Fold this once or twice at the top to harden it a little. This barrier will make sense when the drying process comes along! 
  8. Place the brushes bristles down in a cup or any container. You need the excess water to drip away from the brush so that it cannot seep into the brush and unfix the glue making your bristles come loose and shed. Again- annoying!! 
  9. Leave them to air dry for as long as you want then take them out of the cling film, give them one last pat and use your lovely clean brush(es) with no worries! :D 
TIP: If you are in a rush, try something like as brush cleanser spritz to give them a quick fix clean. Why not try the ELF brush cleanser- it's only £3!

Keep smiling, you're beautiful! x